Bagatto
A transparent, extensible static site generator
Getting Started With Bagatto
Building a website with Bagatto consists of three steps:
- Installing the Bagatto executable;
- Writing a Bagatto site;
- Building your site.
Let’s cover those in order.
Installing Bagatto
Bagatto is built using the Janet language and needs Janet to be compiled. You will use the Janet package manager, jpm, to install it.
Getting Janet
Install the Janet language. You can download the release here: https://github.com/janet-lang/janet/releases
It’s available on Homebrew: https://formulae.brew.sh/formula/janet
And on AUR: https://aur.archlinux.org/packages/janet-lang/
You can read the Janet docsfor more information.
Once you install Janet, you’ll have access to the jpm command.
Installing Bagatto
The Bagatto source is available at https://git.sr.ht/~subsetpark/bagatto.
You can use jpm to install it.
Installing with sudo
Run the following command:
sudo jpm install https://git.sr.ht/~subsetpark/bagatto
This will download and the Bagatto library with all its dependencies, then compile the bag application and install it. (on my machine, it installs it to /sbin/bag).
Installing without sudo
Clone Bagatto to a working directory and then build it. By default, jpm will install things globally, but you can easily specify a local directory. Here’s an example:
~/code-src/bagatto [master] ⊕ jpm --local load-lockfile
<all the deps get downloaded and compiled...>
~/code-src/bagatto [master] ⊕ jpml --local build
generating executable c source build/bag.c from main.janet...
found native /home/zax/code-src/bagatto/jpm_tree/lib/markable.so...
found native /home/zax/code-src/bagatto/jpm_tree/lib/_jmod_posix_spawn.so...
found native /home/zax/code-src/bagatto/jpm_tree/lib/json.so...
found native /home/zax/code-src/bagatto/jpm_tree/lib/_sh.so...
compiling build/bag.c to build/build___bag.o...
linking build/bag...
The bag executable is now in the ./build directory. You move it wherever you like (I move mine to ~/bin/).
Writing a Bagatto Site
It might help to read the manual at some point. This will be more of a whirlwind tour.
Creating the Index Module
You should create a directory that will hold all of your source files. Bagatto doesn’t expect any particular folder structure or names, so it can be as simple as you like. Let’s create one called favorite-dogs/, which will be a website featuring some of our favorite dogs.
code-src [] ⊕ mkdir favorite-dogs
code-src [] ⊕ cd favorite-dogs/
code-src/favorite-dogs [] ⊕
Bagatto needs a single Janet file, called an index module, to evaluate. It can be named whatever you like. Let’s write one called index.janet.
This is what it will contain:
(bagatto/set-output-dir! "site")

(def img-path-copier (bagatto/path-copier "static"))

(def data {:dogs {:src (bagatto/* "images/*")
                  :attrs bagatto/parse-base}})

(def site {:static {:each :dogs
                    :dest img-path-copier}
           :index {:dest "index.html"
                   :out (bagatto/renderer "/templates/index")}})
This index module defines one source, which is a directory called images, two outputs, which are a file called site/index.html and a site/static directory, and one template, which is called index. We will create the directories and template.
Here’s the directory structure:
code-src/favorite-dogs [] ⊕ tree
.
├── images
│   ├── baby-bird-sitting-on-a-dogs-head.jpg
│   └── puppy-on-a-skateboard.png
├── index.janet
├── site
└── templates
    └── index.temple

3 directories, 4 files
We created a directory called site but we didn’t create an index.html or static/, as those will be generated by Bagatto.
Notice that our template file has a .temple extension.
Here are the contents of the index template:
<!DOCTYPE html>
<html lang="en">
  <head>
    <meta charset="utf-8">
    <title>Some of my Favorite Dogs</title>
  </head>
  <body>
    <h1>These are some of my favorite dogs.</h1>
    <ul>
    {% (each dog (args :dogs)
         (let [list-entry `<li><img src="%s"/></li>`]
           (printf list-entry (img-path-copier args dog)))) %}
    </ul>
  </body>
</html>
Which consists of the HTML I copied from this page with some Janet code interpolated between {% %}.
In it, briefly, we iterate through the :dogs site data entry, which contains an entry for each image in the images directory. We call the same img-path-copier function that we defined in the index to get a link to the image, and we emit some minimal HTML with that link in it.
This is everything we need to generate a simple web page.
Building a Site
Generating Site Files
In order to actually generate the site, simply run bag <the filename of your index module>.
For instance, here’s the output when we run Bagatto on our new site:
code-src/favorite-dogs [] ⊕ bag index.janet
Reading dogs data spec...
Beginning 1 jobs...
Loading dogs...
[dogs] Loading 2 files
Finished jobs.
Reading static site spec...
Reading index site spec...
Beginning 2 jobs...
Generating paths for static...
Rendering index...
Finished jobs.
Starting worker pool with 3 workers...
[WRITE] site/index.html
[COPY] site/static/puppy-on-a-skateboard.png
[COPY] site/static/baby-bird-sitting-on-a-dogs-head.jpg
Terminated worker pool.
code-src/favorite-dogs [] ⊕
It opts for a fairly verbose logging level, narrating its progress. At the bottom we see that this invocation resulted in the writing of one new HTML file and copying over two static assets.
The resulting file tree is as we’d expect:
code-src/favorite-dogs [] ⊕ tree site/
site/
├── index.html
└── static
    ├── baby-bird-sitting-on-a-dogs-head.jpg
    └── puppy-on-a-skateboard.png

1 directory, 3 files
The resulting site can be hosted as static HTML. To make things available on the web, we need to do two things:
- Host the files
- Serve them
Both can be done for free/cheap and with minimal maintenance on our part.
Hosting Site Files
I like to create a git repo in the output directory, which can then be used to easily mirror the files into git hosting.
code-src/favorite-dogs [] ⊕ cd site/
code-src/favorite-dogs/site [] ⊕ ls
index.html  static
code-src/favorite-dogs/site [] ⊕ git init
Initialized empty Git repository in /home/zax/code-src/favorite-dogs/site/.git/
code-src/favorite-dogs/site [] ⊕ git add index.html static/
code-src/favorite-dogs/site [] ⊕ git commit -am'Initial commit'
[master (root-commit) f10cdd2] Initial commit
 3 files changed, 14 insertions(+)
 create mode 100644 index.html
 create mode 100644 static/baby-bird-sitting-on-a-dogs-head.jpg
 create mode 100644 static/puppy-on-a-skateboard.png
At this point, we can easily create a GitHub/GitLab remote for this repo.
code-src/favorite-dogs/site [master] ⊕ hub create bagatto-quickstart
Updating origin
https://github.com/subsetpark/bagatto-quickstart
code-src/favorite-dogs/site [master] ⊕ git push
Enumerating objects: 6, done.
Counting objects: 100% (6/6), done.
Delta compression using up to 8 threads
Compressing objects: 100% (6/6), done.
Writing objects: 100% (6/6), 2.16 MiB | 949.00 KiB/s, done.
Total 6 (delta 0), reused 0 (delta 0), pack-reused 0
To github.com:subsetpark/bagatto-quickstart.git
* [new branch]      master -> master
You can see for yourself here: https://github.com/subsetpark/bagatto-quickstart
Serving Site Files
Both GitHub Pages and Netlify have a no-cost option for serving static sites.
Using Netlify’s New site from Git feature, I created a new site and hooked it up to the GitHub repo.
Here’s what I see:
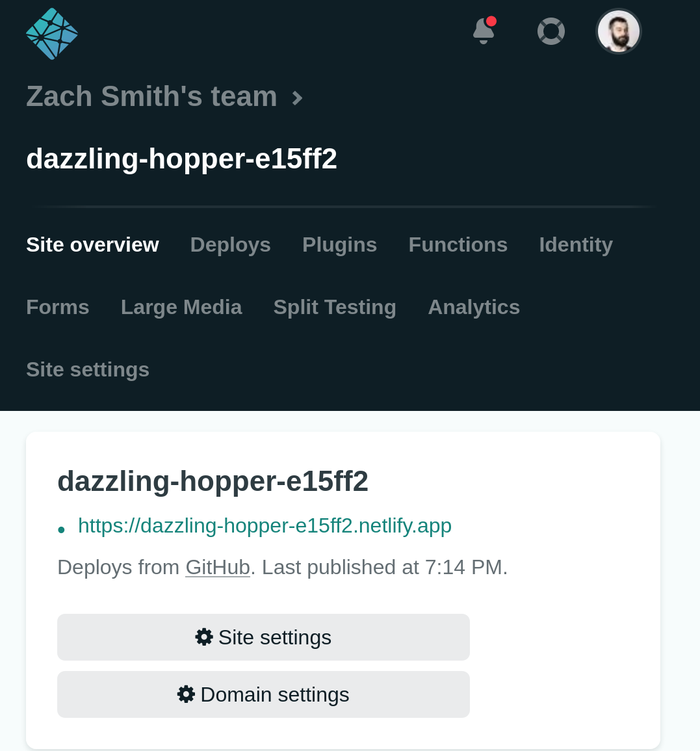
The site is now hosted on Netlify at https://dazzling-hopper-e15ff2.netlify.app/.
Any time I push a new commit to the GitHub repo, Netlify will pick it up and redeploy.
More Reading
This has been a whirlwind introduction to getting a Bagatto site up and running. We’ve seen a handful of useful functions in the bagatto/ namespace in the code samples; those and others are documented in the API. You can also read the Manual for more in-depth discussion.